You know I’m working on my basement and I wanted to share my thoughts on the product I’m using for the ceiling grid, CeilingLink. Generally, they have been very positive and I’d recommend it if you are in a similar situation.
What is it and who is it for?
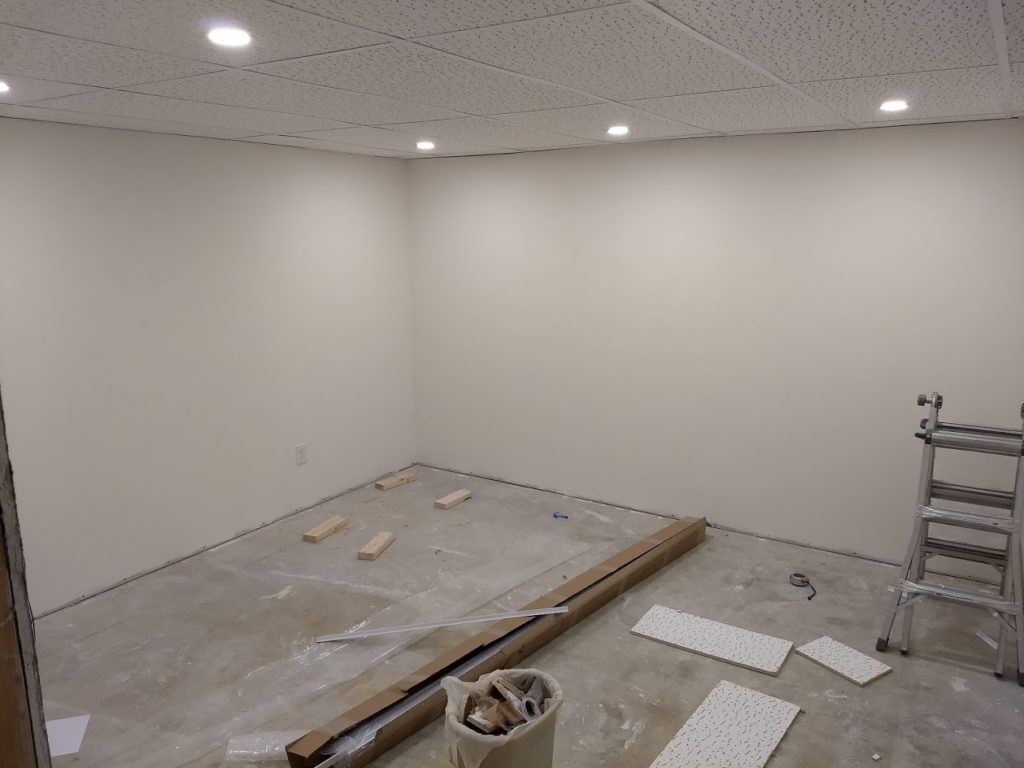
CeilingLink is a direct-mount grid system for ceiling tiles. My basement has 7’2″ ceilings from floor to joist, so I needed something that would give me as much headroom as possible, being that I’m 6’5″. Classic drop ceiling was out of the question. I wasn’t interested in drywall for a variety of reasons: effort, cost, and access. With ceiling tiles, I can remove a few to access whatever I need to access that’s up in the ceiling. Plus, I’m not convinced that drywall looks much better than tiles. The other benefit is sound reduction, as ceiling tiles can help absorb some between the basement and the main floor upstairs. Finally, a lot of people leave the basement ceiling exposed. The primary reason we didn’t want to do this is spiders. There are a decent amount of spiderwebs in those joists and it feels warmer and cleaner having a real ceiling.
With that in mind, I had really only two choices: buy CeilingMax from a big box store in a kit or buy CeilingLink online and order exactly what I need. CeilingLink was more appealing in that I wouldn’t have extra pieces I don’t need from a pre-made kit, plus the cost is a bit lower.
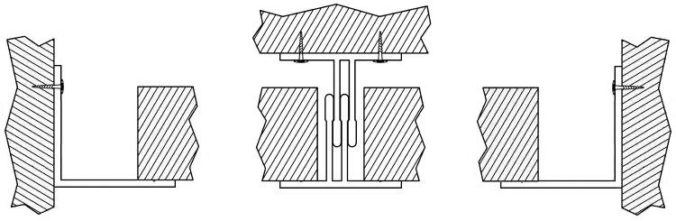
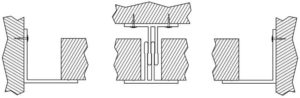
The other cool thing about CeilingLink is that there are really only two or three different pieces that’d you’d need. I only needed “L channel” and the “CeilingLink” pieces. They also have “C channel” pieces available for situations where you can’t secure an “L channel” to a wall. The “CelingLink” pieces work for both the top runner and the bottom (visible) runner and it is nice to be able to minimize waste this way.
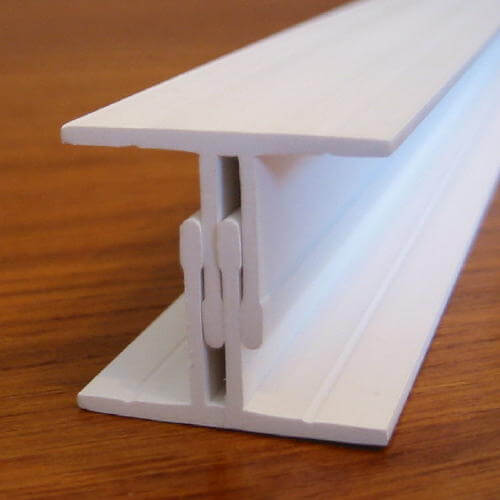
The main “Ceiling Link” piece works for both the top track and the bottom track. The groove is for screws to fasten to the ceiling/joists above.
Installation
Along with the grid system, I also ordered their recommended ratchet pruners, which work great for cutting clean, straight cuts (once you get the hang of it). The whole system is hung with drywall screws, which I already had. I used my new impact driver (that I got on sale for $99) and everything went up easily.
Issues I had
Some of the issue I had were related to the joists and floor not being perfectly even. Because of this, I didn’t hang the drywall all the way flush with the joists in every case. Now that I know the importance of this, I’ll do a better job at the drywall stage and the “L channel” stage making sure the L channel is right up to the joist. One of the benefits to CeilingLink is the PVC pieces are somewhat flexible and won’t break on you. The downside to this flexibility is it it is easy to accidentally attach them so they aren’t perfectly straight.
The other issue I had was with my initial measuring. I was going off my plans and my plans were off by 2-3 inches. This caused me to need one more whole row of ceiling tiles and I had to order more Ceiling Link. Shipping is fast so I only lost a couple days. I’d recommend ordering more than you think you need. Each piece is cheap, it is the shipping that gets you if you need to re-order.
Overall
I definitely recommend CeilingLink and I plan to use it for the rest of my basement project.


Recent Comments