Mostly seedlings, but there’s a lot of potential!
Category: Hobby (Page 1 of 2)
In this video I talk about our chicken setup for winter, and how the chickens are faring. We also had a run-in with a fox!

“You get what you pay for” is an adage I don’t live by. I’m very frugal, so I’m always watch for great deals or just buying cheaper stuff. Many times you are paying for a brand or a “lifestyle”. This applies to nearly everything you can buy, but today I want to talk about tools.
Background: My old miter saw
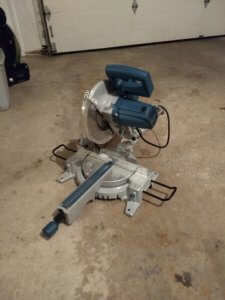 Last spring I built a chicken coop. Everything went really well until my miter saw stopped working. I’m a big DIYer and love to learn new things, but in this case I wasn’t interested it fixing it. I probably needed a new switch, which would require taking it apart, finding a part, installing that part, and putting it back together. I’ve never worked with this type of electronics before, and I didn’t have the time or interest right now to learn right then and there, especially being in the middle of this project. Continue reading

We’ve been using the same Cabela’s Westwind tent for 8+ years and it has been great. However, as a “Ranger” for The Dyrt, I get to test camping products. This time the company was Wenzel, a company that make tents in the budget price range.
For the Ranger review program, we typically get a coupon code to use and I rarely spend more than the total amount (typically $100), but this time I decided it would be worth it. There wasn’t anything I found cheaper from Wenzel that would be really useful for my family at this point, plus I love tents. I picked the Ivanhoe 6 since our only real issue with the Westwind is the setup time/effort.
The Ivanhoe has a simple setup with a single walled design. It is definitely smaller than the Westwind Deluxe, but my oldest son James is now in is own small Coleman dome tent, so we don’t need it to be as big. We plan to use the Ivanhoe in good weather mostly, since we love the weather proofing and vestibule from the Westwind (though the Ivanhoe performed admirably in the rain).
Here’s my video review of the Wenzel Ivanhoe 6 tent:
You can buy it from Walmart if you want your own.

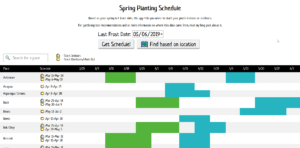
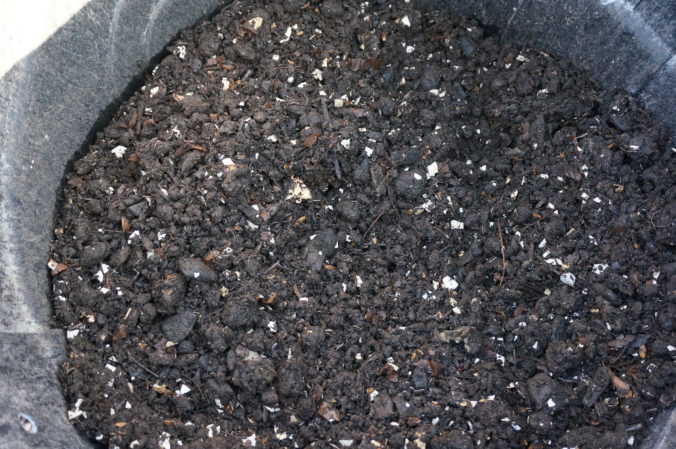
My office recently hosted a “Hack-a-thon”, where we could build whatever we wanted to build. I spend some time on the first day learning some new technology from some co-workers, but the second day I started to build an app that I had wanted to build for a while: a spring planting planner scheduler. Basically, the concept is it tells you when to start seeds indoors or outdoors based on your local last frost date, which is critical because a miscalculation could kill your plants.
Inspiration and Data: Patrick at One Yard Revolution
There are similar apps out there, but the data from mine is from a YouTube gardener named Patrick Dolan. His channel is called One Yard Revolution and he’s my favorite YouTube gardener due to his philosophy of using free, local resources and using the least amount of effort for maximum yields. Patrick is willing to change his practices based on his own trials and peer reviewed research and he shares his success and failures on his channel. He transformed his backyard into a yearlong garden with raised beds, low tunnels, and a hoop house. That’s impressive since he lives in a suburb of Chicago.
A few years ago he released a similar tool, but it is build in Excel/Google Sheets and isn’t the most user friendly if you aren’t comfortable in Excel. It was supremely valuable to me, and was the main inspiration for my app.
For the location-based frost-date data, I’m using the Farmsense API data to get the nearest NOAA station and then the average last spring frost date. I’m going with the date that has 30% probability at 32 degrees.
The app
This app was a labor of love, but if you want to support me and my efforts, you buy one of my garden tool recommendations or just send me some money via PayPal.
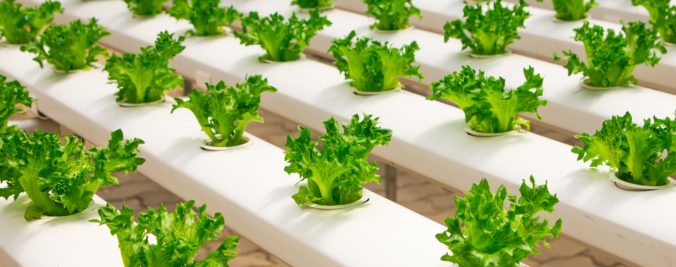
Every winter I get excited about gardening and get eager to start growing. A couple years ago I almost bought an Aerogarden. I didn’t because of its cost, but I resolved to learn about how it worked and if I could make one myself. As it turns out, the “Aerogarden” doesn’t actually use aeroponics, but “deep water culture” hydroponics. Not everyone agrees philosophically that we should be using hydroponics, but the science behind it is fascinating nonetheless.
Hydroponics
Hydroponics, simply, is growing plants in a nutrient solution, without soil. There are various methods to do this, and the Aerogarden is an all-in-one consumer kit. Continue reading
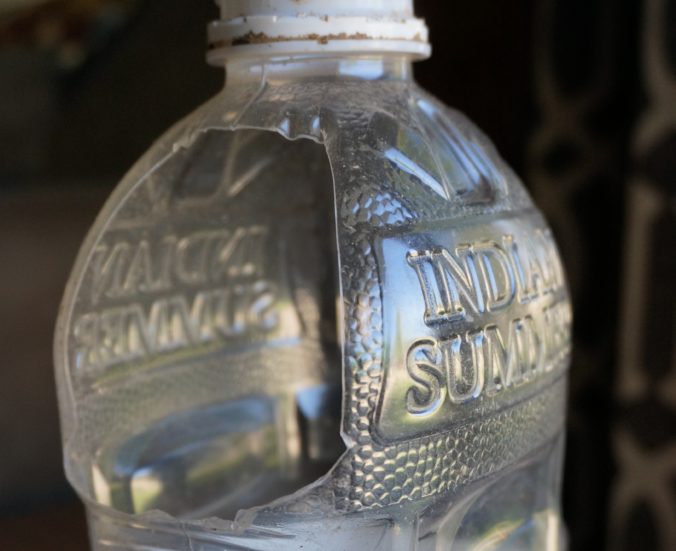
You know I love the birds. I buy black oil sunflower seeds in 50 lb bags and fill my bird feeder all year round. Instead of buying a filler or a special scoop, which do work, I made my own out of an old juice jug. The design is super simple, very effective, and free.
Make it!
Just a utility knife to cut a decent sized hole in the top narrower side of the container (I used a cider jug, but you could probably use a half gallon milk jug, or some other similar plastic container). This hole allows you to use the container to scoop seeds out of your seed bag. Use the juice container’s pour hole to pour the seed/bird food into your bird feeder. Depending on your feeder, you might even be able to leave it hanging while you fill it, like I do.
The final step is to bask in the feeling of saving yourself $6-$15 and the glory of DIY!
Happy birding!


Composting: I do it and you can too!
There’s nothing quite like the smell of decay. Actually, if you are composting properly, it doesn’t smell much at all. Plus, when you compost, you get free natural fertilizer for your garden or other plants AND reduce the amount of waste you are sending to the landfill. (And no, that waste doesn’t compost the same way at the landfill. It decays without enough oxygen or carbon, and produces a foul methane gas mixture.)
“But compost bins are pricey.”
Sure you could spend $100+ on a compost bin from Home Depot or somewhere else, or you could make your own for under $15. This is what I did (I actually made three of them) and the compost is flowing. My bins are made from standard 32 gallon plastic trash cans, with a bunch of 3/4 inch holes drilled in them.  This design has a few advantages and a couple disadvantages.
Pros:
- Cheap
- Easy to start
- Doesn’t take up much space
- Keeps out small animals looking for a snack
- Small enough to move, even when full
Cons:
- Difficult to create hot compost (it is possible, and I have done it, but even if you do get it hot, it doesn’t stay hot for long)
- Requires drilling some holes
Collecting kitchen scraps
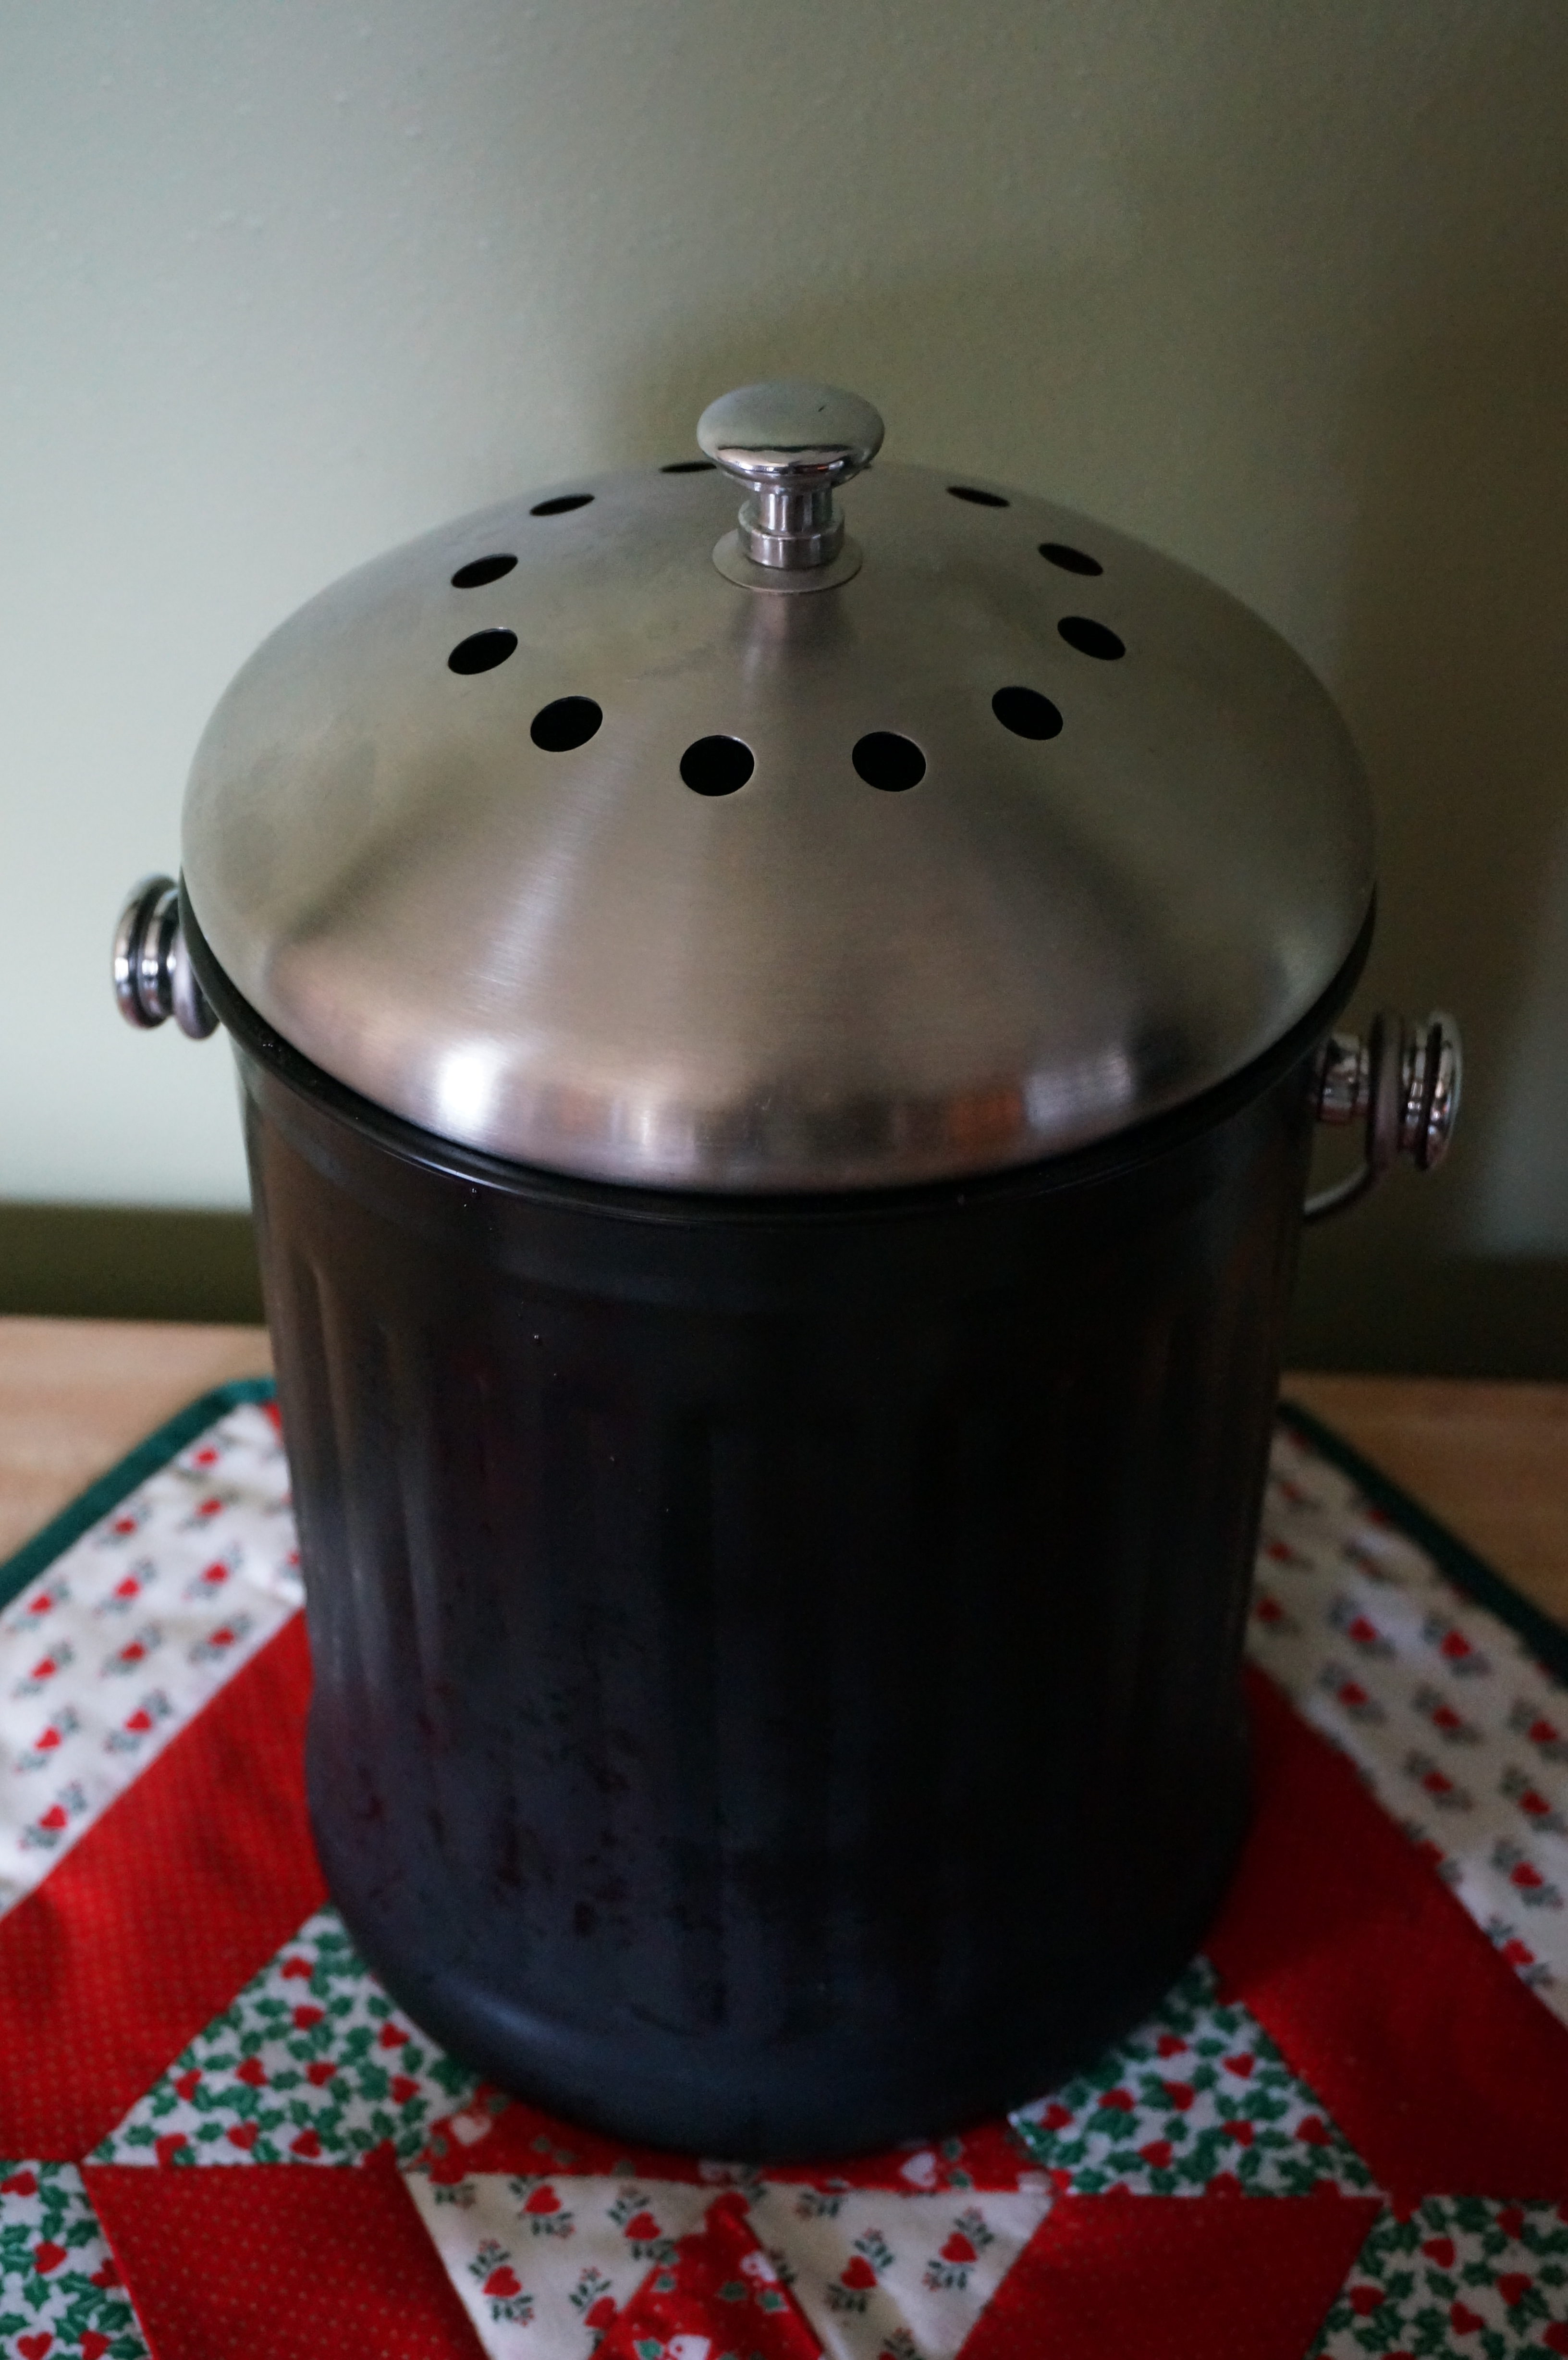 One we started composting we had to change our process. Alyssa does most of the cooking, so she had to stop throwing away fruit/vegi scraps, coffee grounds, and other compostable things, and start saving them. At first we just used an ice cream pail. It worked well, but wasn’t the nicest looking thing. Then after it got colder and we didn’t want to go into the garage to get it (we didn’t want a dirty ice cream pail in the kitchen), I bought a nice looking one that can stay on the counter. It has a cover with a carbon filter so it vents, but doesn’t smell. It matches our kitchen and works great.
Letting it breathe
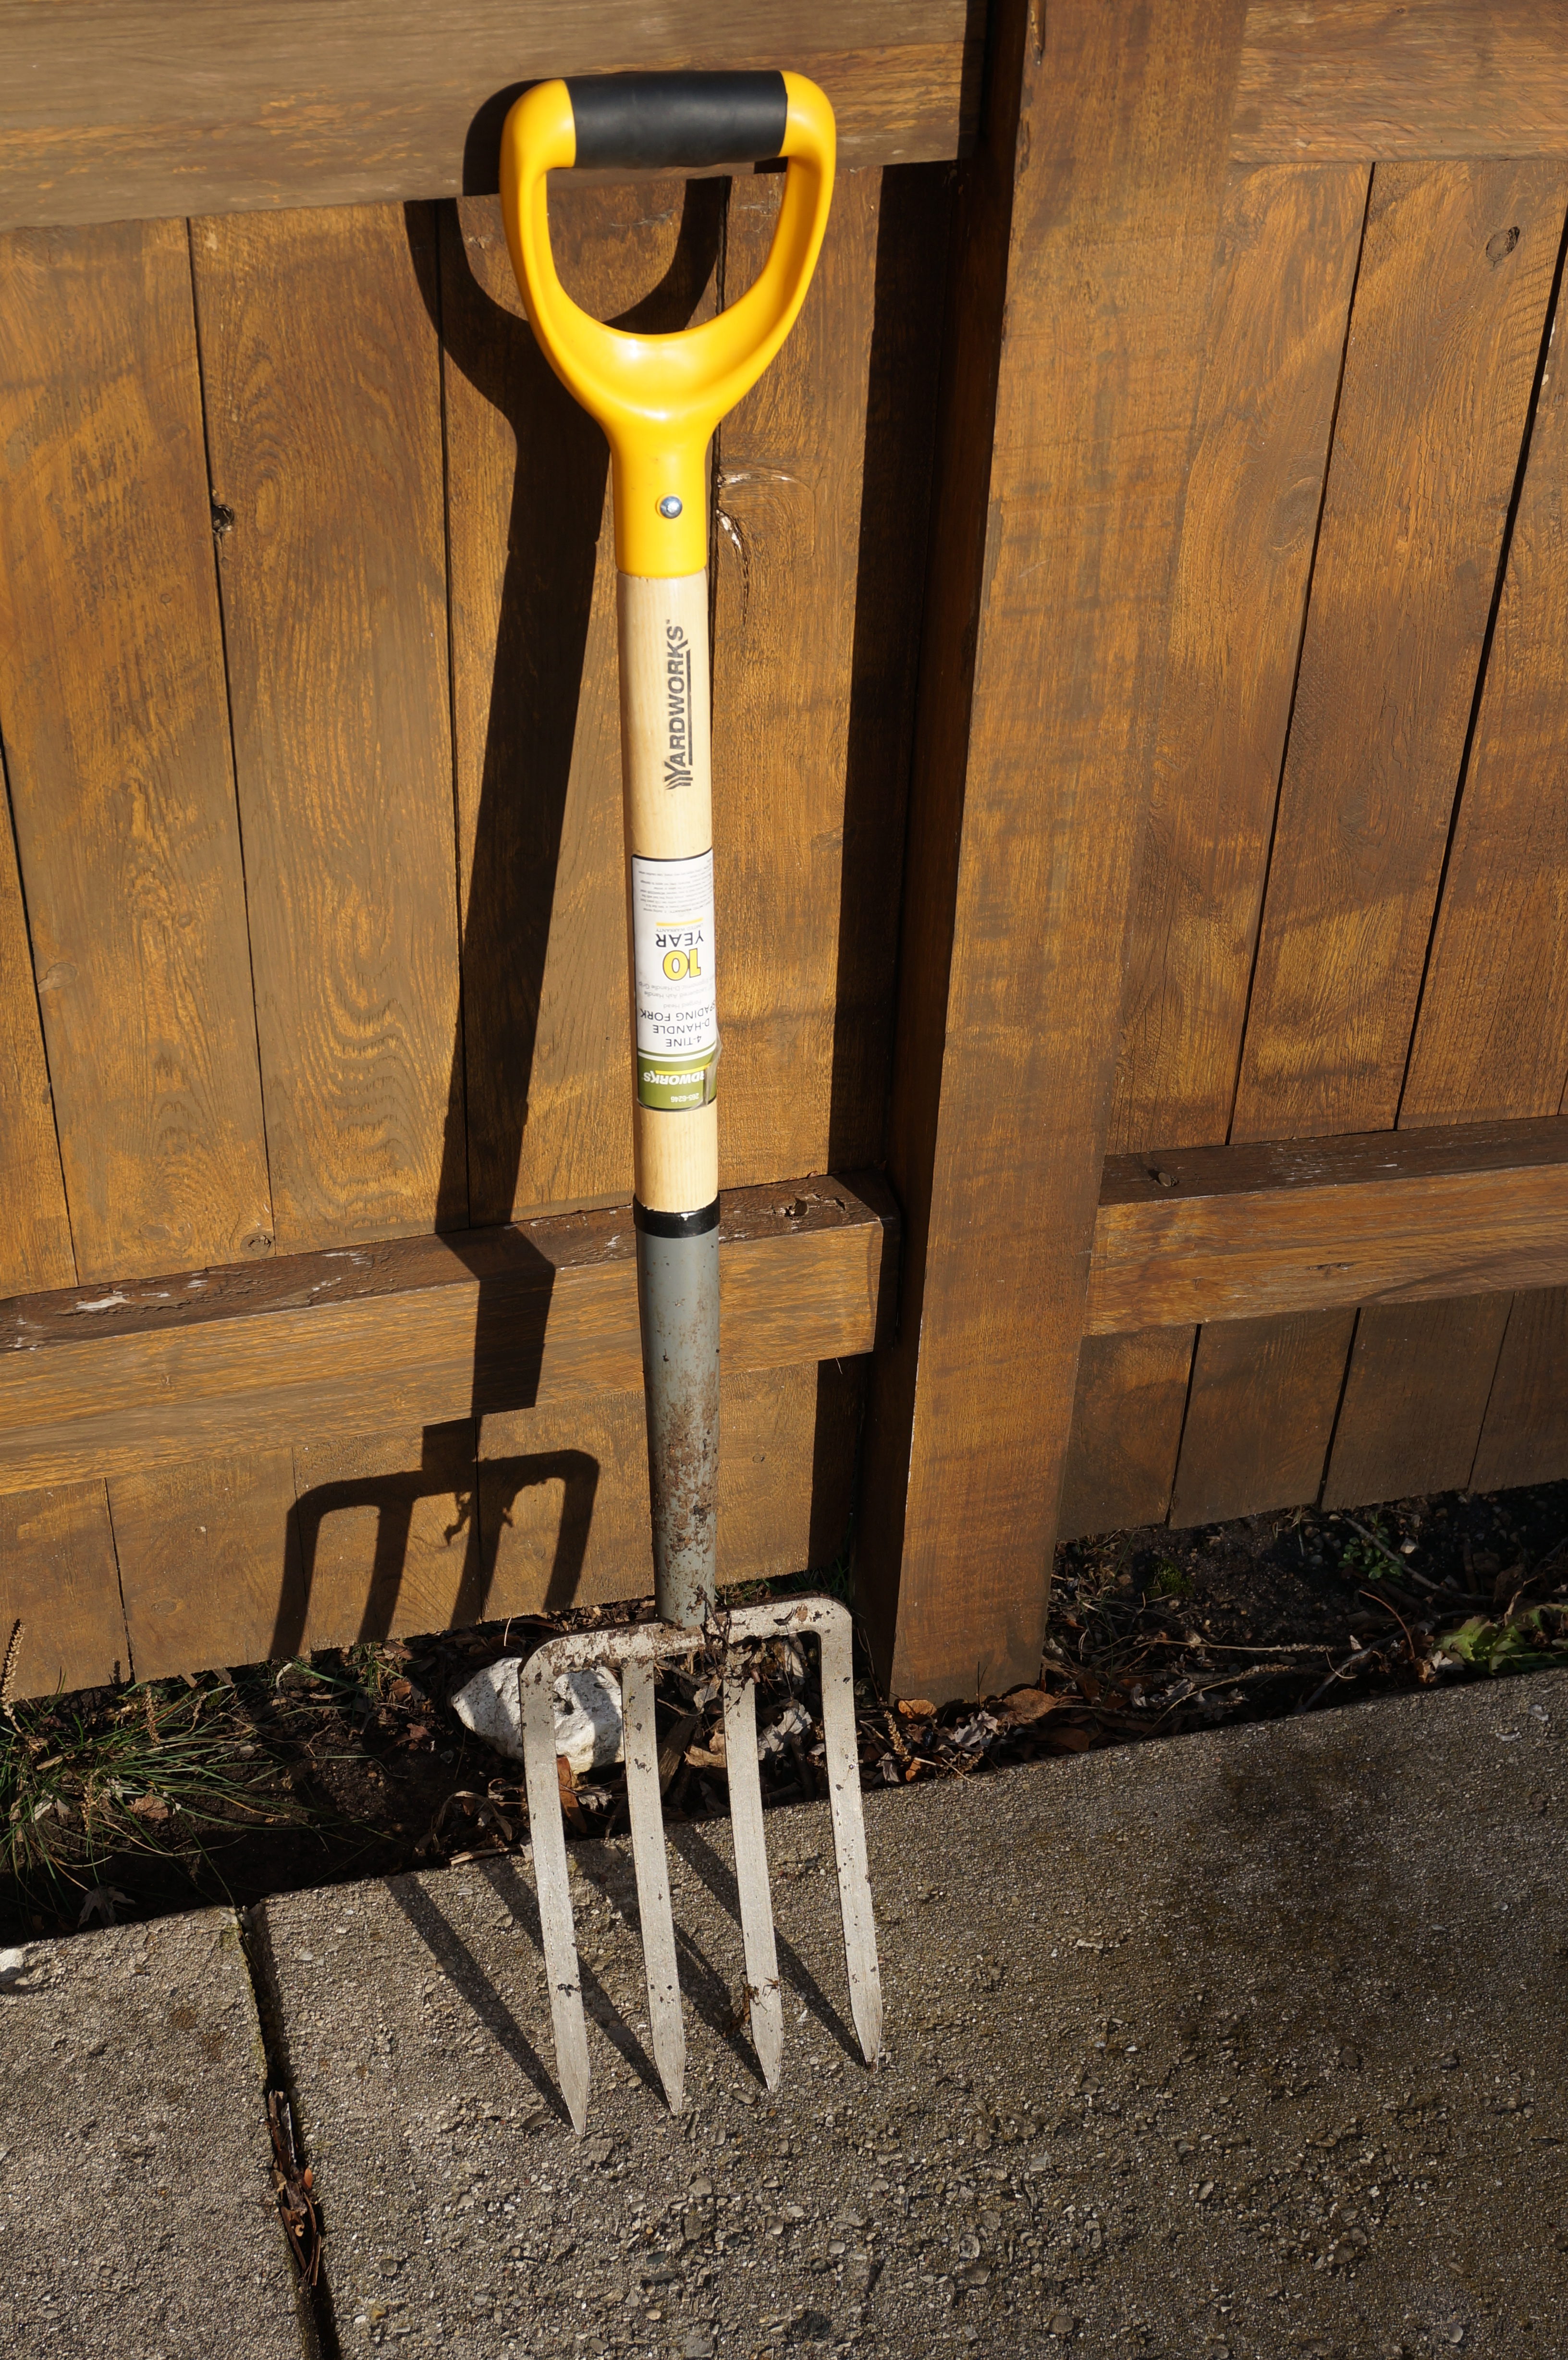 The most important thing needed to maintain a smallish DIY trash can compost bin, besides the correct mixture of Carbon and Nitrogen, is turning it. If you don’t turn your compost, it really starts to smell. They make specialized compost tools, but I just use a garden fork. At first I tried a garden shovel, but I quickly realized that it wasn’t going to cut it due to the weight and compactness of compost, so I picked up my
 pitch garden fork from Menards.
Ramping it up
This is working fine for me at the moment, but if I ever want to speed up my compost efforts there are two ways I’m looking to go: 1) Start vermicomposting (worm bin) and 2) get a bigger compost bin/pile.
Worm bins
Worms actually create even richer compost, and some consider vermicompost as “black gold”. I plan on doing a DIY flow through style bin based on this design. I’d also need some “red wigglers“, which according to /u/GrandmaGos are dirt cheap at a bait shops. (Thanks for the tip!)
Larger bin/pile
If we ever decide to ramp up our efforts even more, I’d consider building a larger bin out of wood or just buying a cheap larger one. A larger bin would be able to accommodate more leaves in the fall, but would also require more “green” materials than we’re currently creating. We’d maybe look at getting used coffee grounds from a local coffee shop and/or growing some comfrey (though we might do this anyway).
Other resources
How to compost: http://eartheasy.com/grow_compost.html
Worm composting: http://compost.css.cornell.edu/worms/basics.html
Compost bin designs (Cornell): designscompostingsystems (pdf)
Great gardening Youtube channel: One Yard Revolution
Me (I’ve done a bunch of research, if you have questions ask me in the comments…)
My bins:


In the winter, we keep a bin near the back garage door so we can keep adding compost without trudging through the snow.


Finished compost.

Unfinished compost

Happy Composting!

As I mentioned in my post about becoming a homeowner, I got into bird watching. Sometimes I feel like I should be retired, because I remember my Grandma and Grandpa Pautz always watching the birds at the bird feeder by their camper.
When we first moved in, the previous owner of our house left her plastic tube feeder and the shepherd’s hook that held it. Once it warmed up a little, I bought some cheap seed from Menard’s and decided to give it a go. I was very fascinated by the birds that came, and impressed that such a cheap feeder could attract a variety of birds. Unfortunately the feeder met its match at the less-than-perfect frisbee throwing ability of my younger brother Joe. The frisbee hit it and it completely shattered. It was an explosion of seed and plastic.
By this point I committed to the birds, so the next time I went to Menard’s I picked up the Wild Wings Cedar Bird Feeder. 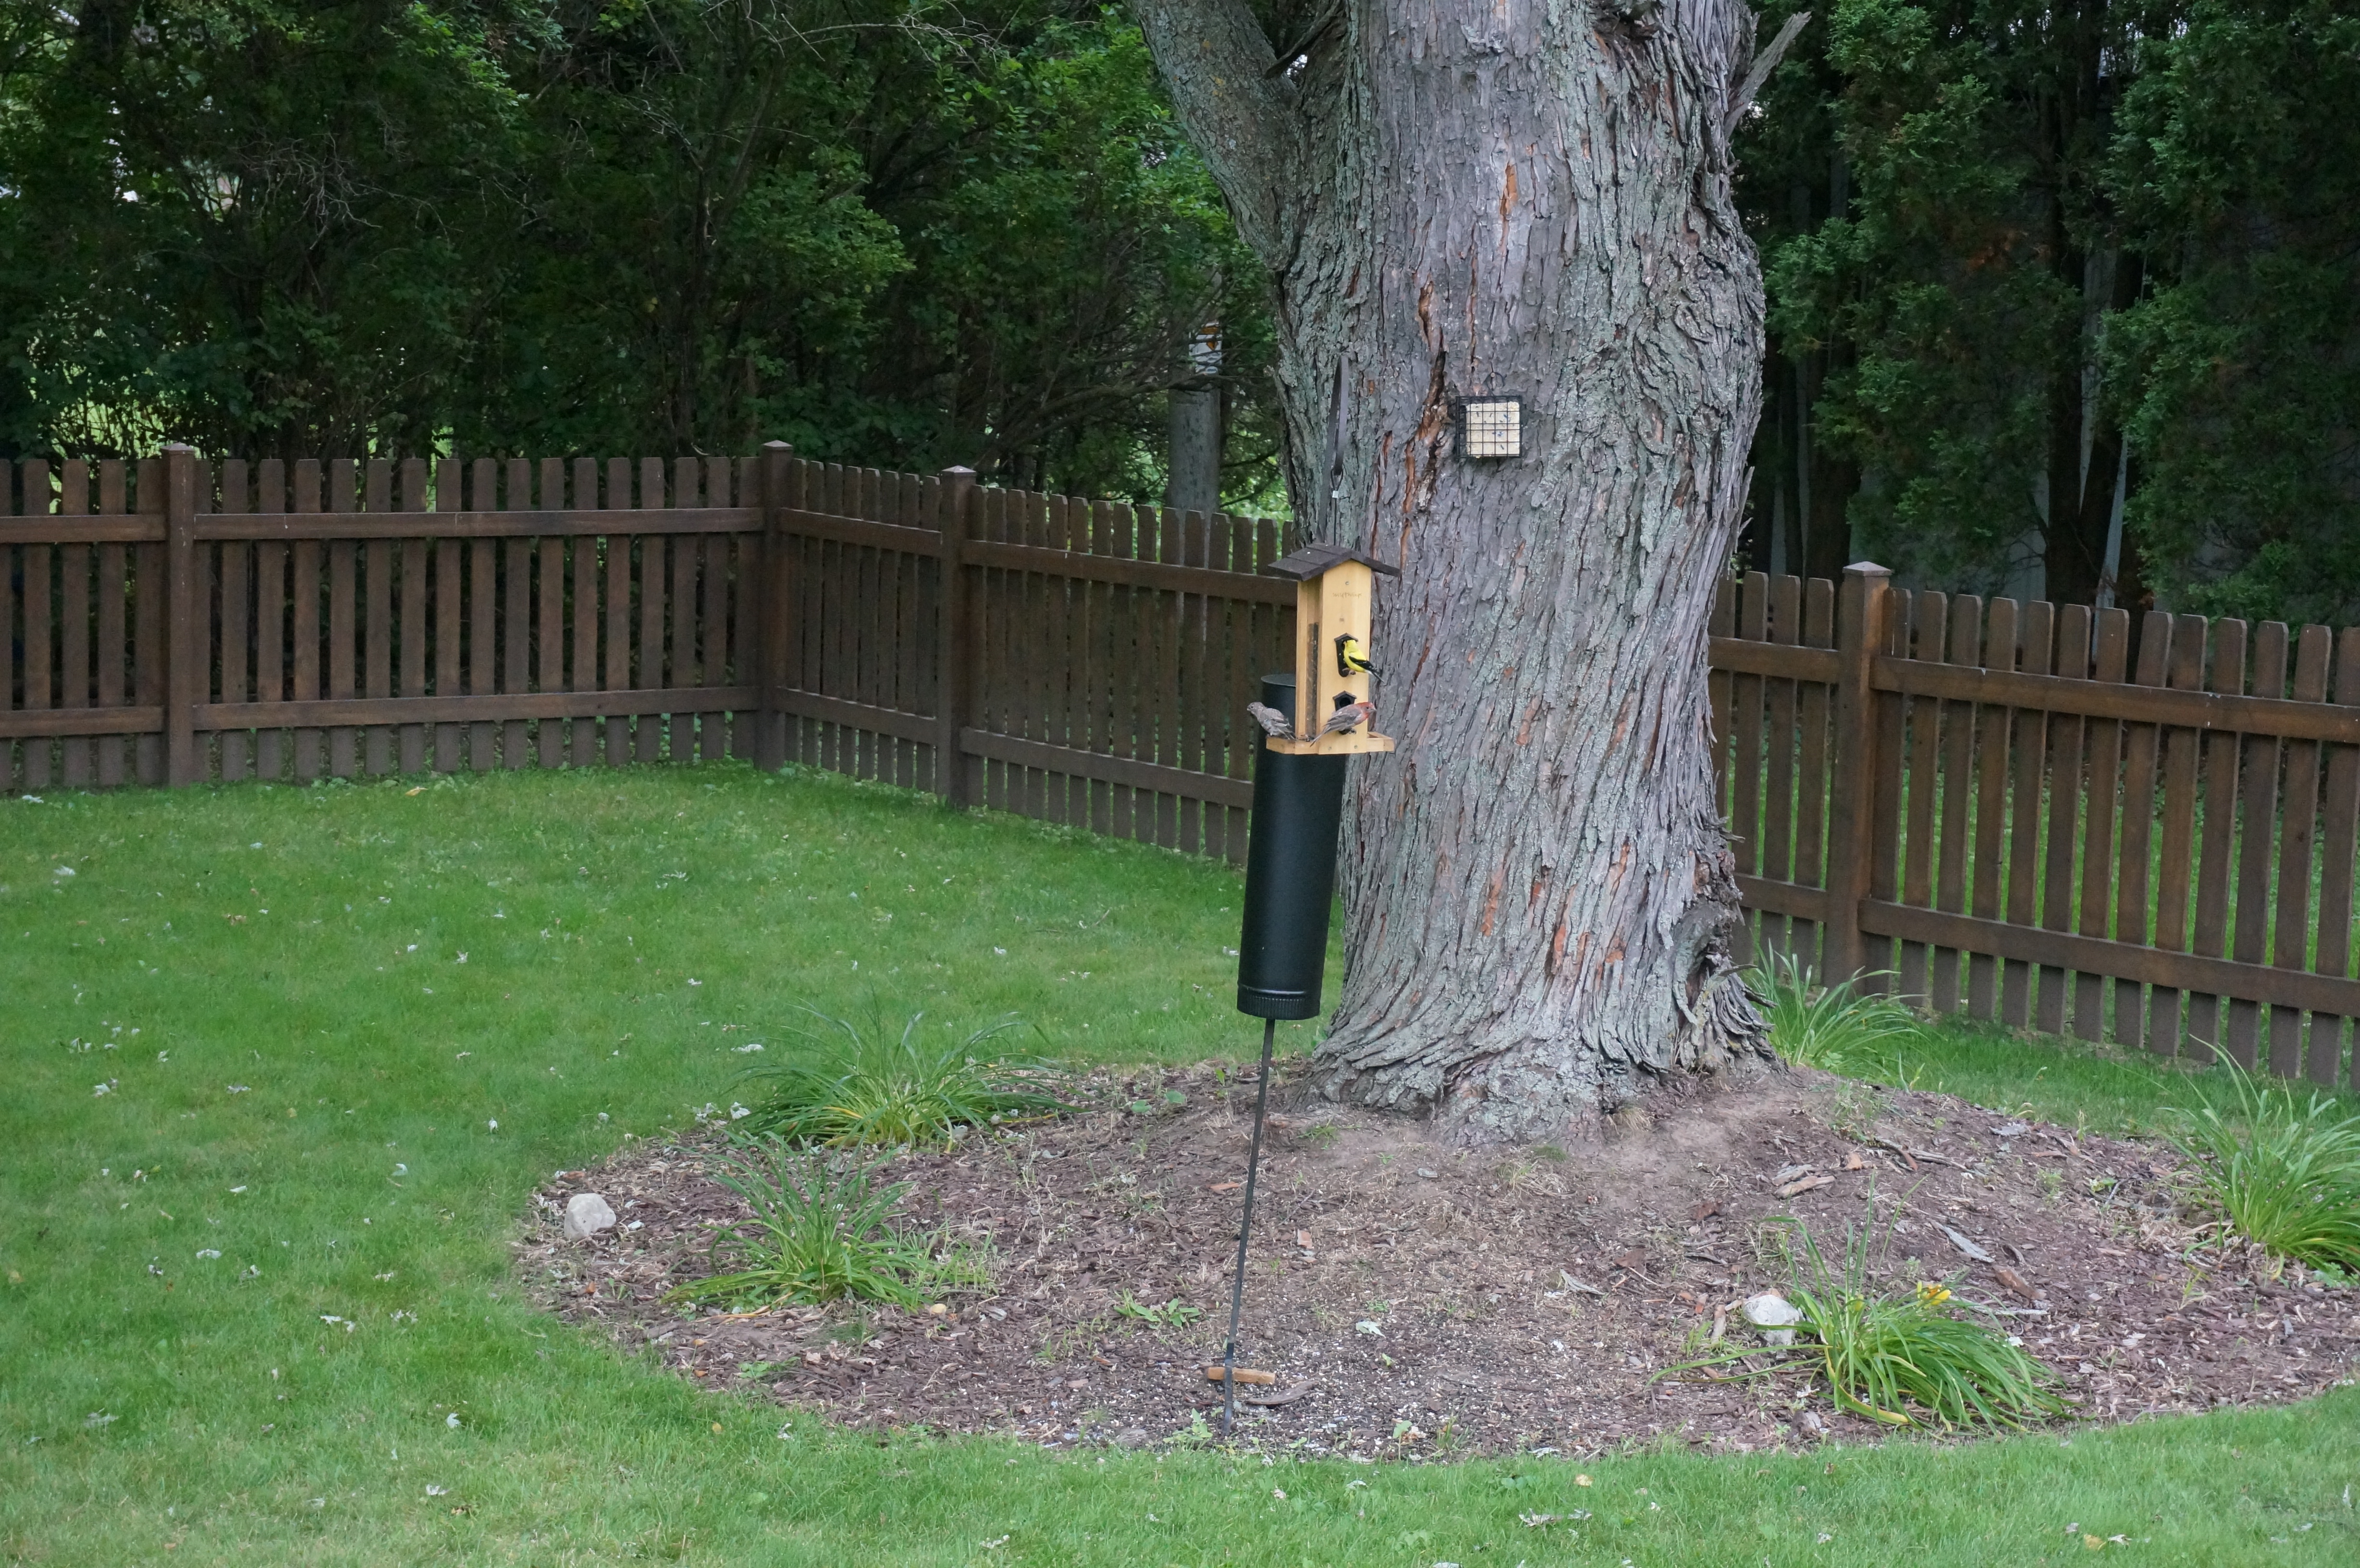
Design
Due to its hybrid design, this feeder attracts larger birds as well as smaller birds. I noticed with the old tube feeder, that cardinals and blue jays and other larger birds only ate what fell, because the feeder wasn’t large enough for them to safely land. The Nature’s Way feeder solves this by combining the feeding ports with a larger bird hopper style. It attracts such a variety of birds, you really don’t need other feeders.
The other problem I had with the tube feeder was difficulty in cleaning it out. The Nature’s Way feeder has removable acrylic windows and a removable grate on the bottom. This makes it really easy to clean. The grate is great because it keeps water from sitting in the seed after it rains, which prevents bacteria/mold.
Finally, this feeder looks nice. Much better than the cheap plastic tube feeder. It also comes in a bamboo version, a wavy style, or a wavy style bamboo version on Amazon. I can whole-heartedly recommend this feeder based on about 6 months of use. (I’ll give future updates on how it does over time.)
Happy bird watching!
[I’ve published an update to my current setup.]
[Originally Published March 23, 2013, Updated January 23, 2014]
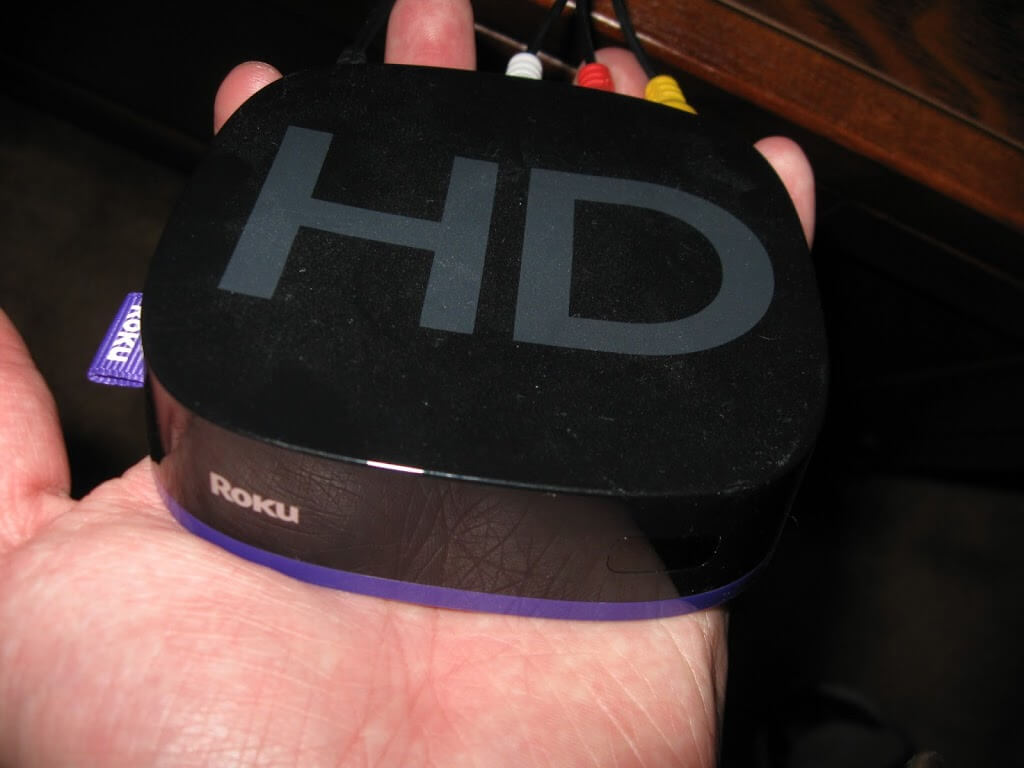
I made one purchase on Black Friday 2012, and I didn’t even leave the comfort of my own home. I fought off the online crowds at Amazon to pick up a Roku HD for $40. We have Amazon Prime and the Roku works great for streaming Prime video.
 |
| My Roku HD |
I also, though, have a USB TV tuner for my computer, which I use with Windows Media Center to record TV shows or movies. After it is recorded I use MCEBuddy to compress the video (which is usually a couple GB) and remove the commercials. MCEBuddy runs in the background and works automatically after the initial setup. Needless to say I have a decent collection of movies and TV shows in video file format.
This lead me to search for a solution to use my Roku to watch the videos I recorded earlier. Since my tube TV does not have any HDMI connections, I can’t plug my laptop directly into it. Plus, that isn’t the most convenient.
 |
| The old laptop-turned server, fits nicely under my TV |
I came across a free channel for the Roku called Plex. It works in conjunction with the free Plex Media server application that runs on your computer. After I got it working on my main laptop, I thought it might be nice to have something running that can always be on and not have to run from my main laptop. I decided that my wife’s 6 1/2 year old laptop that was just sitting around in a drawer would be the perfect candidate. It is slow, the power button needs excessive force from a screwdriver to use, and it was not being used by us. I stuck an extra hard drive I had that was 3 times bigger than the one she had, installed JoliOS Lubuntu (I switched from the no longer supported, Ubuntu 10.04-based Joli OS because I was having performance issues and the new Jolicloud2 interface is slow and annoys me…so far Lubuntu has been much faster and aside from one bug that I had to override, it has worked great), and set it up as a shared server on my home network. I then installed the Ubuntu version of Plex, and got my media server up and running. I use the free home-use version of Teamviewer if I ever need to log into the server to restart it or change some settings.
The other feature with Plex that I love, is the ability to “Publish” your server to the internet for access via Plex’s website or one of their mobile/tablet apps. I can watch my content anywhere with an internet connection, just as long as my server, router, and home network are all online and functioning properly.
Finally to make this all seamless, without the manual transfer of files from my DVR setup on my laptop, to my server, I use SyncBackFree to sync my files over. (MCEBuddy has a save to server option, but I couldn’t get it work reliably).
Someday I hope to build a media server that has the DVR functionality built into it, but my Tuner only has drivers for Windows and I’m fine with my current setup for the time being.
Recent Comments