
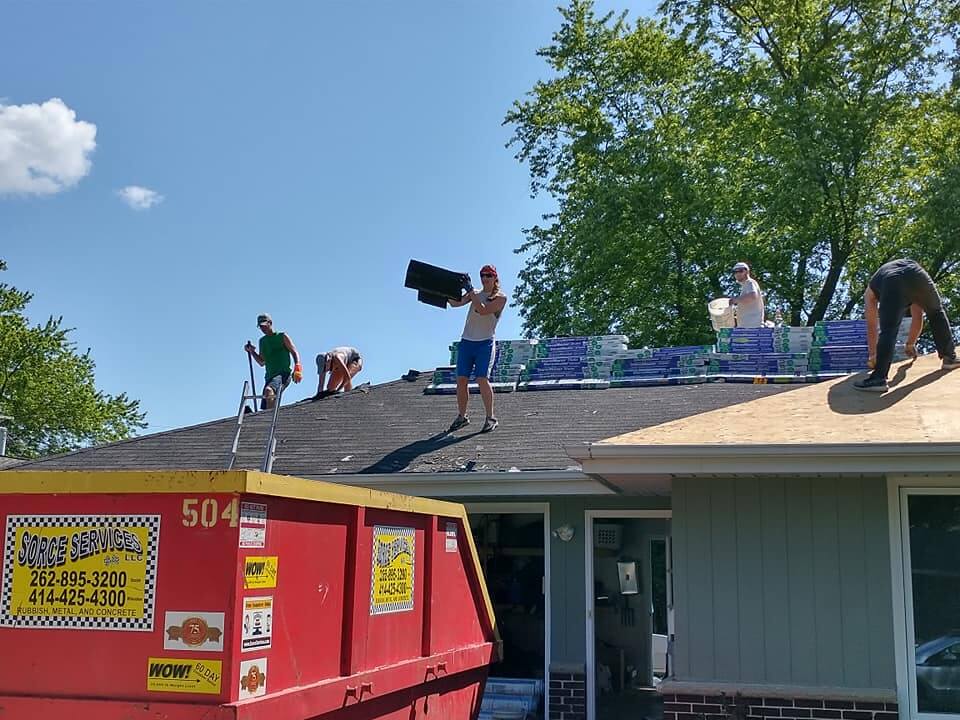
At the beginning of July, with the help of friends and family, I replaced the roof on my house. It was hard work, with a lot of planning, and we needed all that help to get it done as quickly as we did. I’m really glad I did it myself, and would make the same decision to do it again in a heartbeat. I was fortunate to receive an insurance claim for hail damage that covered the costs (and then some). Here’s how it all went down.
The planning
There are a few major things that go into planning a project like this: timing, knowledge, materials, tools. In this post I’ll talk about the timing and knowledge aspects.
Timing
The timing was very important, so I worked out some dates and picked the weekend that all my family and friends could come help. This was critical, because a lot goes into this and having enough labor make it happen more quickly.
Nailing down the date was also important, because I needed to know when to schedule the larger materials for delivery (i.e. shingles). I wanted the delivery to happen during the week before, so the shingles weren’t stacked on my roof for more than necessary. I didn’t want any storm to roll through and have 70 lbs bundles of shingles falling off the roof.
Knowing the timing is also helpful if you are hoping to get something on sale. In my case, I got most of my materials from Menard’s, and during COVID for most of 2020 they didn’t have any sales, just a perpetual 11% rebate. In a normal year, materials might go on sale at different times and you can time it out to get some good deals.
To get the date nailed down, I used the web app Doodle. This works great if everyone is willing to participate.
Knowledge
This is the most important thing to have when doing a roof. I had the knowledge and I was in charge of all of my help. I had to teach people how to do certain jobs and then let them work. Much of my time on Saturday was spent directing and teaching others. There was a lot of research that went into it, and it came from a variety of sources. I watched a lot of YouTube videos, but I also read blog/websites, and even checked out some roofing books from the library. Once I got the base level knowledge, I consulted the local building codes to make sure I knew what was required. In my opinion, there’s not a ton of skill involved in most of the roofing tasks, once you get the basics down and know how they should be done correctly. Certain tasks do take some finesse and all tasks require knowledge.
The basics
Safety: All of my help heard the same speech from me: Don’t fall of the roof. Whatever you are working on isn’t worth it. Be safe and smart. My roof pitch wasn’t too bad, but if it were a steeper pitch, I would have invested in harnesses for those of us on the roof. Safety is usually overlooked by a lot of DIYers, but that’s a mistake.
 Tear-off: Labor intensive, make sure you have a dumpster close, tarps around the perimeter, and the right tools (I’ll go into more detail in a future post). Try to get as many nails as possible, otherwise pound them flat. Make sure the plywood deck is clean before the next step. Replace any rotten/bad plywood.
Drip edge/gutter apron: Nail this first around the perimeter. In my case, there was a gap between the fascia wood and the decking, but we made it work.
Ice and Water Barrier: This is pretty straightforward. Make sure you are installing enough ice and water barrier per code (I did two rows to meet code) and put this in all your valleys. This stuff is peel and stick, just need to make sure it is straight and flat (minimize bubbles, the sticky side is really sticky in the summer heat. Be careful walking on this stuff, even though the stuff I got claimed excellent traction, it was horrible to walk on. The asphalt granules came off easily and made it very slippery.
Underlayment: This is easier than ice and water, but instead of peel and stick you use physical fasteners, per the product spec. If you are using tar paper, staples are fine. If you use a synthetic like we did, all brands require a plastic cap nail or staple. I know that professional roofers many times use staples anyway, but it could screw with your warranty if you aren’t installing to spec, so be aware of this. If you hire a roofer, confirm with them that they do this correctly. Synthetic underlayment is much better to walk on compared to ice and water barrier.
Shingling: This was probably my favorite task. Make sure you first put a row of starter strip and then have at it. Once you understand the concept of the pyramid, this can go pretty quick. With architectural shingles, this is really easy to line up without a chalk line, by using the double laminated layer from the previous row and the tip of your nail gun to get perfect lines. I was very happy with how straight the lines on my roof are, this being the first time that my brothers and I have ever shingled. Make sure you know how to shingle around obstructions (vents, pipes, etc.) and do your best to minimize waste.
Valley flashing: Do an open metal valley. There are a bunch of methods of shingled valleys, but the shingles in a valley get more wear and tear and tend to wear out faster. (Look around your neighborhood and you can confirm this.) It’s slightly more cost/effort, but totally worth it to do an open metal valley. Make sure you get painted valley flashing, plain galvanized will rust eventually. Use a chalk line to trim your shingles straight on the edge of the valley.
Hip/Ridge shingles: This took more effort to get straight lines and I’m not happy with everything I did here from a cosmetic standpoint, but it’s not hard. Just read the package to know what reveal is needed.
Chimney flashing: If you have access to a sheet metal brake (or want to rent one), you’ll have more options here, but I special ordered reglet flashing from Menard’s that was pre-bent. If you do this, it isn’t too hard to install with sealant and rivets. I used this method from IVY Tech Community College and it worked great. My first try failed (I tried to replicate the old flashing with the reglet flashing and it looked bad and didn’t work well.
Some of the tricks I used
Cutting shingles: I used a combination of a utility knife (with hooked and straight blades, depending on situation) and tin snips to cut shingles. I preferred the snips, generally, and even used them as a point of reference for getting my staggers cut.
The pyramid: This isn’t hard to figure out, but you really need to know it because it is critical to making sure you don’t get seams stacked and it makes you more efficient. There are a bunch of YouTube videos on this, but it also explained it on the bundle pack.
Have a helper: I had my sister handing me shingles while I nailed. My two brothers worked together and had a helper (I’m not exactly sure how they were doing it, but I guess it worked for them). With my sister helping me, I was very efficient and accurate.
Screw some wood into the fascia to protect the drip edge from the ladder: I replaced my gutters at the same time as the roof, so to protect the drip edge from being damage by my ladder, I used some wood screwed into the fascia, sticking out past the drip edge. Alternatively, you could use a ladder stabilizer, but that puts pressure on your brand newly laid shingles, so it isn’t ideal.
Some things to watch out for
Don’t walk on the tar strips: we figured this out pretty quickly, but there are some tar footprints on one of the sides of my house. Oops. The summer sun makes quick work of melting the tar and getting a good seal.
Stay hydrated and protect yourself from the sun: When you are on the roof, you definitely don’t want to get lightheaded, you could fall off and die. Be smart and safe.
Tear off tarps can scorch your grass in the summer sun. We had some temporary dead patches around the house where the tarps were laying down.
Watch the weather: you don’t want to get caught with your pants down in the rain. Make sure you have tarps ready if there is any chance of rain before you can at least get all the underlayment installed.
Nails will fall everywhere: this is what the tarps are for, but the tarps won’t catch everything. Get a magnetic sweeper and someone with good eyes to help pickup all the other nails. Also, be careful you don’t get a nail in your foot.
Don’t be stupid.
Recent Comments